I use it as a front end to Capture One. It is so useful as a front end.
That is very much the case. Initially, all I did was to import all my hierarchical keywords from Capture One into PM (because I use the PM Metadata Template to label and keyword all ingested images before importing them into Capture One). It was only later that I realised how I could set the copyright automtically to update the year every year (as just one example).
There’s certainly a lot to learn as you use PM6+ but, in my experience, it’s well worth the journey.
I briefly tried Capture One on a free trial basis as its RAW processor gets high marks. Ditto for DXO Photo Lab. Neither of them grabbed me. I found Photoshop unpleasant to work with as well. Something about Affinity’s approach works for me.
It’s good we have choices! If nothing else, this forum demonstrates that one size does NOT fit all.
For the cameras I’ve used, you could make some naming customizations in-camera but not as extensive as you can when your PC/Mac software transfers them in from the SD card.
P.S. Congrats on the “Z6ii coming this week!” I thought I was committed to DSLRs but finally said quietly to myself this morning, “I would really like to have a Nikon Z6 II mirrorless camera.” However, the approx. $3000 with one 24-200 kit lens will prevent that from happening for a while.
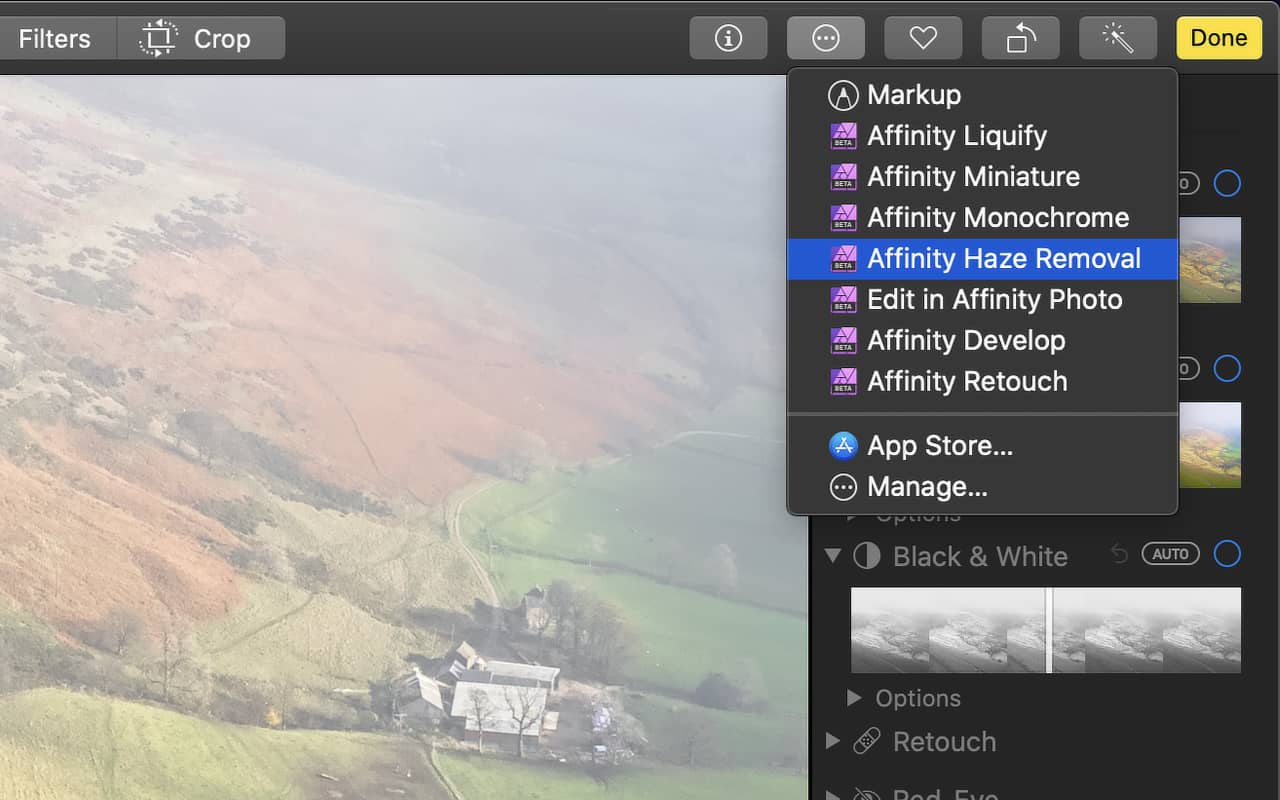
The Affinity Liquify, Miniature, Monochrome, Haze Removal, Develop and Retouch extensions can be applied to an image without leaving Apple Photos.
Alternatively, you can send an image to Affinity Photo to use the app’s full toolset, and then save the result back to your Apple Photos library.
Affinity Photo’s extensions are available from Apple Photos’ Extensions button. Click Manage if they are not listed here.
Edits made using the extensions are not permanent. To roll back to the original version of a library item in Apple Photos, -click the image and select Revert to Original.
When not to use the extensions
Complex edits involving advanced features, such as layers, masks and live filters, for which you require multiple editing sessions are best conducted by exporting to an external file, loading that file into Affinity Photo, saving your work in the.afphoto format.
When editing is complete, export the final version for publication or (optionally) for importing into your Apple Photos library.
To enable Affinity Photo extensions for Apple Photos:
Open System Preferences and click Extensions.
Select Photos Editing.
Put a tick next to the Affinity Photo extensions you want to use.
To edit an Apple Photos library item using an effect-specific Affinity Photo extension:
Click Edit on Apple Photos’ toolbar.
Click the Extensions button—an ellipsis in a circle—on the toolbar.
Select one of the above Affinity extensions.
Use the tools that appear in the dialog to edit the photo.
Terrific articles. I’ve never done it that way. I describe the photo and get the date in there. And while I’ve taken tens of thousands of photos I want to keep, I can get away with is I’m not a professional. I also often create nearby empty files which describe additional info to expedite a search. And I do the “get info” routine when I feel motivated.
I know it can’t compare with Nikon’s new 70-200 except on price but you might want to check out the surprisingly favorable review from July of the Nikon Z 24-200mm f/4-6.3 VR that gives it high marks despite its being an entry-level superzoom.
The only recently available Nikon Z 70-200mm f/2.8 VR S is a faster lens with the best image quality that pros look for but it is also bigger, heavier, and quite a bit more expensive. Those are always the trade-offs aren’t they?
If you like the Apple Photos app for photo management then you are all set. Otherwise you might want to look into How to Cull Your Images Faster with FastRawViewer which is an inexpensive photo viewer that would let you keep your photos directly in the Mac’s file system. If you’re willing to spend more to get more, check out the Photo Mechanic 6/Photo Mechanic Plus apps that are described by many as the full-featured software to beat. See Fstoppers in-depth review Part 1 on Importing Photos or Part 2 if you want something like Lightroom’s catalog functionality.
Faster isn’t always better, even though it usually means more expensive. I was once told a fast lens would fix a particular shooting situation I had — mountain bikers in a forest. But some quick calculations showed it was a terrible idea, as the very narrow depth of field when shooting from trackside would have had one pedal in focus and one not! Never mind the rider.
Yeah, for me the smaller, lighter, and less expensive 24-200mm f/4-6.3 would be my choice. More versatile for less money with still acceptable image quality. But I’m definitely an enthusiast and not a pro.
If you have an f/5.6 lens and require a fast shutter in low light then the ISO will need to be cranked up. If the ISO goes too high, image quality suffers.
In the same situation with an f/2.8 lens you have the option of using the wider aperture and lowering the ISO by two stops. This will reduce noise from high ISO but also reduce the depth of field significantly. “Fast” in respect to lenses simply means “wider aperture”. Wider aperture means shallower depth of field. If you’re close to your subject that’s a huge consideration.
I solved my problem with a new camera that had a significantly better sensor with much less noise at the same ISO settings.
Yes it has! The Pentax K10D I was shooting with at the time started getting terrible noise from about ISO400. The K-5 I replaced it with would regularly get used at 1600 and now I have a KP and incredible noise reduction in DxO PhotoLab, I let the ISO float to 6400.
One key aspect to a “fast” lens is that it improves autofocus. Even if you expose the the image at f8 or smaller, the aperture is always at the max of what the lens can give when aquiring focus. More light to the sensor means higher accuracy in the focusing system.
Sensor size also affects the area in focus. Using the same lens at f2.8 on a full frame and a crop frame (APS-C) sensor, you will get more of the image in focus on the smaller sensor.
This is actually working in favor of the iPhone 13 Pro and its new macro mode - in addition to having a darn practical size for getting in close.
Good point about more light improving focus, and smaller sensors increasing depth of field (although Apple then go to extreme lengths to fake a larger sensor in that regard).
However, the small size of the iPhone is only part of the equation in “getting close” — it’s a darned hard device to hold steady in most situations. Ergonomically it is probably the worst camera you can buy.
IIRC a smaller sensor doesn’t change focus, but it increases apparent depth of field, which makes it look as if focus is affected. The apparent effect is to make a f/2.8 lens on APS-C appear to offer the same DoF as f/4 (approx) on full frame.